When you are teaching students how to edit, there are a few things that you need to consider. Firstly what you will want them to edit - usually, moving image and audio. You will therefore need the things which go with this. In this guide, you will be able to find out about the best editing software for your budget, top tips and more.
Hardware
You will obviously need access to computers. When students are editing, it can take more than a few lessons - especially when they get really into it. You may want to consider having access to a classroom after school hours, so students can drop in and use them, or you have bookable laptops for students to use in and out of lesson time.
You will also need some microphones for voice overs and it can be useful to have a ‘recording studio’. This could be a cupboard that you utilise! Your school will be pleased with the creativity you have used, and you can actually create a sound proof room on the cheap - yes, egg boxes do work. You can also use either egg box foam (available online) or acoustic tiles.
You need to also think about how the work is downloaded from the camcorders to the computers. Normally with Macs, firewire cables are advisable as they are quick and efficient. Your camcorders may however use DVDs or tapes. You need to organise and ensure that all your cables and hardware is compatible before you get started. If you need more bespoke advice, please contact us.
Headphones are helpful so you don’t hear everyone’s films at once (selfishly) and so they can concentrate on their own work. If you can get double head phones, headphone splitter units (which two people can listen to their work). It is worth speaking to your music department to see who supplies theirs. These can be very cheap.
You will need disposable resources like rewriteable DVDs, cases for them, Sharpie pens and labels. Otherwise you will end up with lots of non-named work. Even if your students are uploading everything to a blog, it is a good idea to get a few DVDs burnt just in case.
Server / Storage
One thing you MUST get organised in advance is the storage space / server for this work. Students will need to do two things here which will cause issues for you and your school / college IT technicians if you are not careful:
- Uploading lots of film footage
- Saving moving image and audio files
In order not to have full stand up arguments in your staff room, there are a few proactive measures you can take.
Speak to your ICT Team
- You will probably need to increase the size of your students’ school storage accounts. Explain about the amount of footage they will upload EACH (it can be 30 minutes or more for a 2 minute video when they start) and the digital still image and audio files.
- See if they can help you with a different server for your space. This means their work will save faster and be more reliable. If you are the only one with Macs (lucky you!), then they might be happy to do this. See if they are having a refresh, and ask if you can use an old server. This will make it cheap for them, and therefore be a plus point for you!
Look at External Storage
- Can your students use USBs? Can you? Many schools are cracking down on this because of viruses. Another way would be using external hard drives. Lacie are the best and a fair price. An alternative is using your school stationery supplier and getting students their own USB for the subject (which they hand into you and you can back up) or a key per group. If you are using video 16GB Memory Sticks are the minimum specification.
If you do not do this, you may well find hours of headaches as students try to download / save work… and it only gets deleted. Try not to save work directly onto the desktops of the computers and computers are often purged during holidays. Ensure students double and triple save their work! Otherwise, there will be tears before lunchtime, I promise.
Software
- Existing Software | Find out what the school / college has licences for already. You may be able to negotiate time on their workstations or use an existing licence to install the software you need on yours.
- Cost | It’s possible to keep costs down by using a low / mid end software package on a suite of pcs / macs and having a few workstations with an advanced editing package installed.
- Discounts | Remember to ask about Educational Discounts.
Audio Editing
Low End
Audacity | Free, easy to use and good results.
http://audacity.sourceforge.net/
Garageband | Part of Apple’s iLife software bundle. Easy to use and good results.
http://www.apple.com/uk/ilife/garageband/
Mid End
Apple Logic Pro | ‘Whether you’re a professional or play in your garage, Logic Pro 9 gives you everything you need to write, record, edit and mix music.’
http://www.apple.com/uk/logicpro/
Serif | See comments about Serif Design Suite in ‘Video Editing’.
Sony Acid Pro | See comments about Sony Vegas Movie Studio Platinum 10 or 11 above.
High End
Adobe Audition | Part of Adobe’s Creative Suite. Industry standard.
http://www.adobe.com/uk/products/audition.html
Photography Editing
Adobe Photoshop | Either PS or PS Elements.
http://www.adobe.com/uk/products/photoshopfamily.html
Adobe Photoshop Lightroom 4 | ‘Adobe Photoshop Lightroom 4 software provides a comprehensive set of digital photography tools, from powerfully simple one-click adjustments to cutting-edge advanced controls. Create images that inspire, inform, and delight.’
http://www.adobe.com/uk/products/photoshop-lightroom.html
Serif | See comments about Serif Design Suite in ‘Video Editing’.
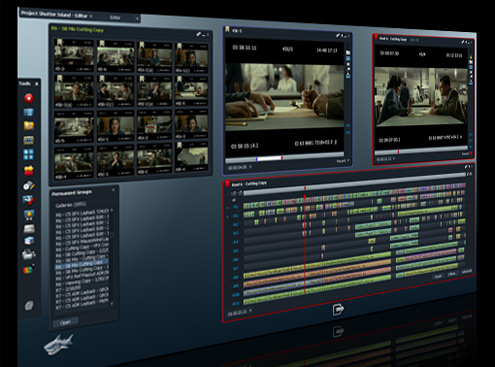
Video Editing
PC Software
There is a wealth of software out there for PCs, ranging from the good to the expensive. Try to get the best editing software you can, and don’t just put up with the existing school software. Remind SLT that this is a major part of the course - and the final results! Here are the top types of software available now for editing with PCs.
Low End
Adobe Premiere Elements 10 | Just under £80 from Adobe (but you might be able to get student discounts). It - like Photoshop Elements - is a more stream lined version of the industry standard and therefore great for students finding their feet. Here is the link. The Social Network was edited in this.
Corel VideoStudio Pro x4 | Just under £60 and there is a free trial.
Here is the link for educational site licenses. It is easy to use, you can do stop motion animation and there is integrated Blu-Ray and DVD burning. There are packages with their Paint software available as bundles (at the time of writing).
Pinnacle Studio HD V.15 | Again just under £60 on their site. Similar to Corel.
Windows Movie Maker | DVD burning is available with Windows DVD Maker (Windows 7 Home Premium, Windows 7 Professional, Windows 7 Enterprise, Windows 7 Ultimate, Windows Vista Home Premium, and Windows Vista Ultimate editions). Here are a few tips but remember there are limited effects and transitions.
Zwei Stein | it’s free! It is a non-linear video compositing and editing system. You can edit up to 256 video, audio and still image clips - and there are effects. It can be a bit tricky but worth a look!
http://www.thugsatbay.com/tab/?q=zweistein
Here is a YouTube Tutorial too.
One to watch | Lightworks Lightworks is being used in Hollywood and there is a Mac version out soon. Films like Pulp Fiction, The Departed and Shutter Island were edited in this. It is also FREE!
Mid Range
Pinnacle Studio HD Ultimate | You can upgrade from Studio HD v.15 and get additional effects and surround sound, or the Studio HD Collection (with green screen and more transitions) for just under £100.
http://www.pinnaclesys.com/PublicSite/uk/Products/Consumer+Products/Home+Video/Studio+Family/
Serif Design Suite | ‘Powerful and easy-to-use software in the Serif Design Suite ensures creative and exciting ICT across your school. Every pupil can produce professional-quality work and learn industry-relevant skills with high-end tools and techniques. And affordable licences make it great value.’
http://www.serif.com/Education/SerifDesignSuite/
You can get some really professional results. Look at last year’s AQA AS Media Studies coursework exemplars on the AQA website and find the Music Promo (Blowing Fuses). It got full marks and was produced using Serif. Serif also allows you to create websites. I find the packages very intuitive - the students really don’t have
problems with how to do things, and I actually enjoyed using it.One of the things I like about Serif is they have great on-line tutorials, so the students can watch and practice:
I also like the fact that students can purchase copies of the software at only £10 per element (or £45 for the whole suite). They don’t have to do this through me though (so no silly collecting in of money, etc.) they just contact Serif and say that they are at our school which has a full licence. They post overnight. So, students can work at home and at school with compatibility.
The downside of this is, if we don’t upgrade when Serif do, they send the students the latest version - not necessarily the version we have in school. However, they tell me their packages are now both-ways compatible, so this doesn’t really matter (i.e. can open new version in older ones).
They are also quite good at sending “freebies” - we got sets of all the manuals (too many - don’t know what to do with them!) when we upgraded a few months ago. [Teacher Recommendation]
High End
Avid Studio | On their site for £139.95. This is industry standard and is used by Hollywood directors (like Eddie Hamilton, the Editor of Kick Ass). It has a huge timeline, advanced effects and can author discs.
http://www.avid.com/uk/products/avid-studio
You are also able to get tutorials online for this. You can buy a range of plug ins. The green screen backdrop is not available on download versions.
Sony Vegas Movie Studio Platinum 10 or 11 | This is where you start talking big bucks. This starts at £494.95. It does all you would expect and supports 3d. You might as well get Premiere or Avid though - mainly as it does the same things and is much cheaper! You can also get basic versions from £40. Here is a comparison of features.
Mac Software
As iMovie is part of all Macs, it is difficult to look beyond this - and to be honest, you don’t really need to. If you need more help with it, check out your local Apple store for a free training session or use the inbuilt tutorials. They are very clear and can even be used for lesson starters. Here are a few links and an introduction for the main Mac editing apps:
Low End
iMovie | Free with iLife and Macs. This does all you need - you can get an ‘A’ at A Level with this, so it really is all you need. Using drag and drop, you will need to get stuck in with it as it is a typical Apple product and you really learn from doing. You will be surprised how quickly you are able to add effects, transitions and create DVDs (using iDVD). Here is a link.
High End
Final Cut Pro 10 | Just shy of £200 this is the best you can get, if you have the cash. Impressive timeline, speedy editing and a great finish. This is a great piece of software to have, if you can afford it. What can be a good idea is to have it on one computer, rather than a whole fleet. This then allows your gifted and talented / advanced editors to have a go with it. Here are the top features and here is the download on iTunes.
Web Production / Editing
Website production is more challenging but does mean they can be rewarded for the “technical proficiency” required for the top level of the mark scheme. If you’re doing web design don’t use web templates.
Serif | See comments about Serif Design Suite in ‘Video Editing’.
Adobe Dreamweaver | Industry standard.
http://www.adobe.com/uk/products/dreamweaver.html
Additional Software | High End / Industry Editing including Finishing and Grading
If you really want to go to town, these are industry standard:
DaVinci | High end editing colour grading and film restoration software.
http://www.blackmagic-design.com/
Smoke | For finishing. The product. The showreels are great for illustrating editing techniques with your classes.
Editing Film | Top Tips
When teaching editing, it is best that you have a go too. If you have not done this before, and only know about editing a holiday home movie, here are a few suggestions to ensure that your students know what to look out for and how to improve their work:
- Timeline | shots should make sense in the order they are placed. It might be that students download their initial films and the shots are not in chronological order. Get them to roughly cut them first, and pop them into order. They can then trim down each piece of continuous footage, or each shot as suits them. Encourage them then to ‘hack’ into it, rather than trimming it all down first and then arranging.
- Continuity | They must make sure that if someone is wearing a black jumper, sweating or has a bruise over their left eye, that it looks the same in the next shot. The action in the shots must be physically continuous. This also applies to the weather. This can make it tricky, as sometimes the weather (and therefore light) can change in an instant. Get the students to at least plan for this, and then they will be prepared. There are now whole shows about this so it does happen (just not in your classroom with any luck!).
- Selection | does it tell the story, does it create the message / pace / tension needed? Students should reflect, decide and revise shot choice. They shouldn’t just chuck all their footage in. This is easier if they have stuck to a storyboard. There is a process of selection here already. If they just go out and film, the footage can be bulky and meaning can be lost. By selecting shots, and being able to articulate the choices is a great skill for them.
- Edit On The Action | if your subject is standing, then sitting and you have changed shots, you need to consider when you should change from one piece of continuous action to another. Is this once they have sat? As they are sitting? Or before (and they move into frame)? A good first lesson on editing and camerawork, is to get students to film one person walking into a room to talk to another person sitting at a table. This is very basic, but they will have to consider angle, and when to cut. This can help them to create meaning, ensure their work flows (the action is continuous) and that the audience is not confused. It is worth having a lesson where you introduce them to the hardware - either with yourself or a technician.
- Wait until the action has finished to cut to a still shot | otherwise it looks like you have cut them off mid-flow. This can be as they run towards someone or even walk into a room.
- Pace | sometimes you will want to hold a shot and therefore will edit after a longer period of time. A shot normally lasts more than a second and less than 10 seconds. This is so the audience can focus on the action / dialogue / setting. If you want to create a sense of panic, danger or chaos (for example with a chase), you would jump cut.
- Smooth vs Rough | If you want to shock or create rhythm, you can edit to sound. For example in a music video, it means sense to cut to the beat of the music. If you are editing a TV Period Drama, you would edit to create a more realistic feel to the piece and therefore use longer continuous shots.
- Montage | series of shots together, rather than using continuous shots. It can give a lot of information, or illustrate time passing.
- Editing Music | As said above, one way is to cut to the pace of the music. Normally this is on the first beat of each bar.
- You can also edit if there is a change in music | from loud to quiet, or orchestral to electronic or from choir to orchestra.
- Dialogue / voiceovers / narration needs to be edited to fit with the action | It could be that you have a voiceover for someone writing a letter to illustrate their thoughts; this is a simple case of adding the dialogue to the action (someone writing) and you may also have some music in the background. This means you will have three different areas to edit. You will need to ensure that the voiceover and music are balanced, so the audience can focus on the area you want them too. Or you may have asked one actor to sing, and have a different performer to act as if they are singing. Students will then have to lip synch - get the audio and action to fit. They will get extra marks for this, as it is tricker. Another area they may need to look at is having several voices at the same time (for a dream or chaotic scene), or they need to exaggerate a conventional noise (glass smashing for an explosion or a gun being fired for an action film). Again, this is just a case of balance.
- If you want students to use slow motion or speed up the action for a music video, there is a simple way to do this | If they are singing at the camera, either make the song faster or slower and get them to lip synch it at this speed. Once the song is at its normal pace, they will look like they are singing in time but the movement around them is faster / slower. (If they lip synch to fast music, at a normal pace the action will look slower and vice versa).
Editing Workshops
Edusites run Editing Workshops for staff and / or students. We come to you. Click here for more information.
Editsense
Lastly, if you would like some clips to use in lessons, or if you would like some footage for students to play around with BEFORE they start their productions, I would suggest you get Editsense. It allows you to learn the basics in an interactive way. There are 50 video examples and it covers all the basics of film language. For more details, please follow this link.